
Managing multiple companies
Add companies to your organization, switch between them, and manage the plan, seats, and team of each one.
One CLEATUS organization can hold several companies. Each company has its own plan, seats, and Capture Profile. CLEATUS finds and tracks the right work for each one. This article explains how the organization and its companies fit together. It also shows how you add, switch, staff, and bill each company.
Organization and company
The organization is your top-level account. It has a name, a logo, and a web address, such as cleat.ai/dashboard/your-organization. The Owner edits them in Settings > Organization Info.
A company is one business inside the organization. Each company has its own:
- Plan, subscription, seats, and credits.
- Capture Profile, and so its own recommendations.
- Pipeline, documents, and Custom Alerts, which its users share.
- Company name and logo (Settings > Edit Company) and integrations (Settings > Integrations).
Users and roles belong to the organization. Each user has one role in the organization and can work in several companies. Your My Account and Notifications settings are personal, so they apply in every company. You get a separate recommendations digest for each company that you belong to.
Add a new company
Who can add a company:
Only the organization Owner can add a company.
- Click Settings in the sidebar, then click Companies.
- Click Add a New Company.
- Select Monthly or Annual, then pick a plan:
- For DATA or DATA + AI, click Get Started and pay at checkout.
- For DATA + AI + Automations or GovCloud, click Schedule a Demo to talk to the CLEATUS team.
- After checkout, complete the setup screens: Company Details, Capabilities, Preferences, Experience, and Finish Up.
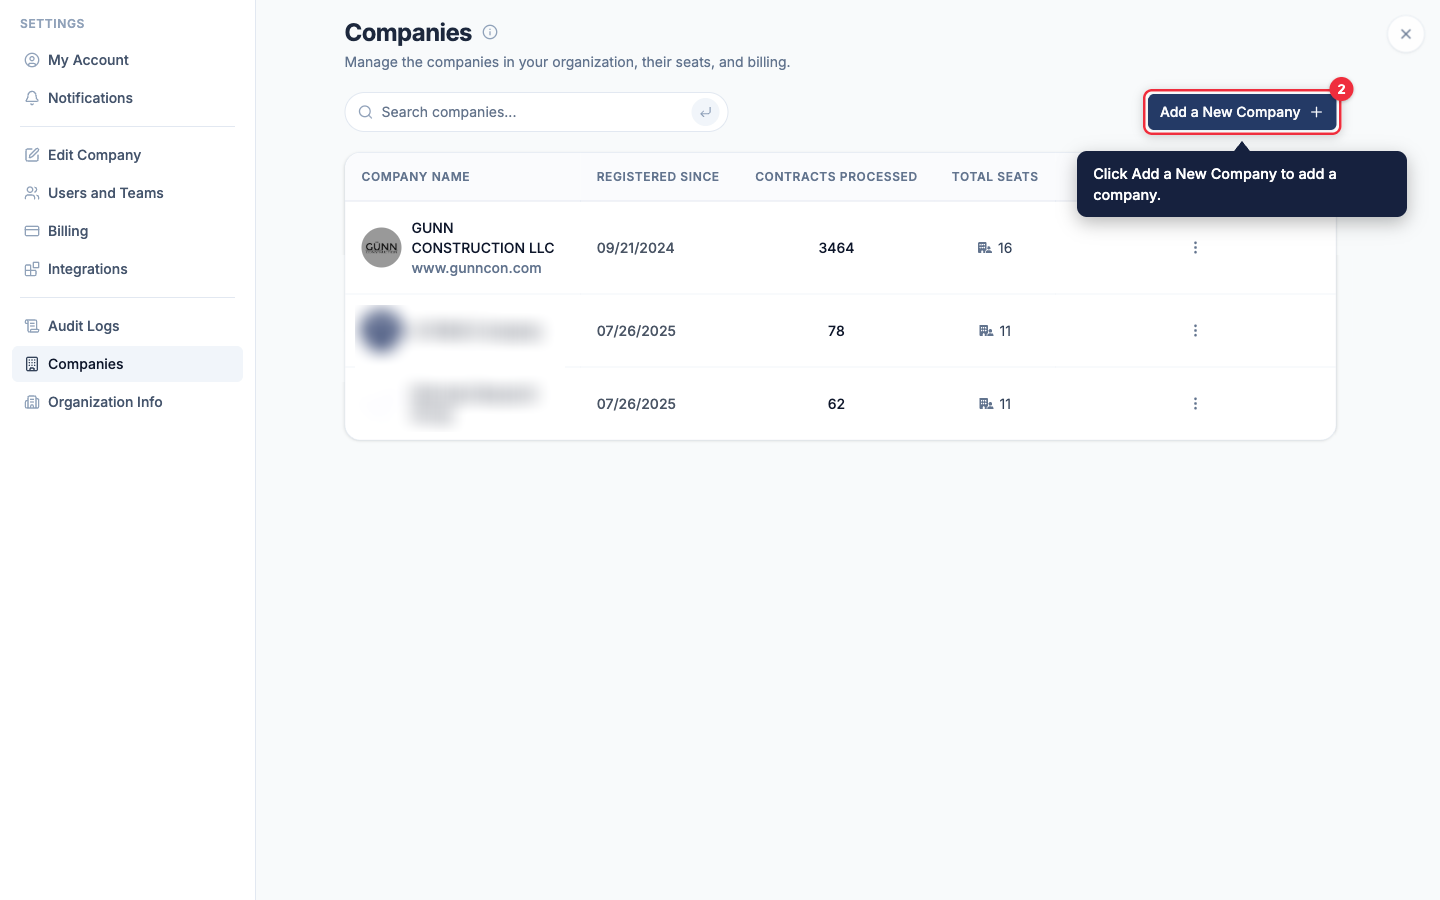
A new company in an existing organization does not get a free trial. You pay for its plan at checkout. For help with the setup screens, see Setting Up Your Capture Profile.
If you started a company and did not finish its setup, CLEATUS asks you to finish it first. Click Complete Company Setup. In the Companies list, an unfinished company shows Finish Setup.
Switch between companies
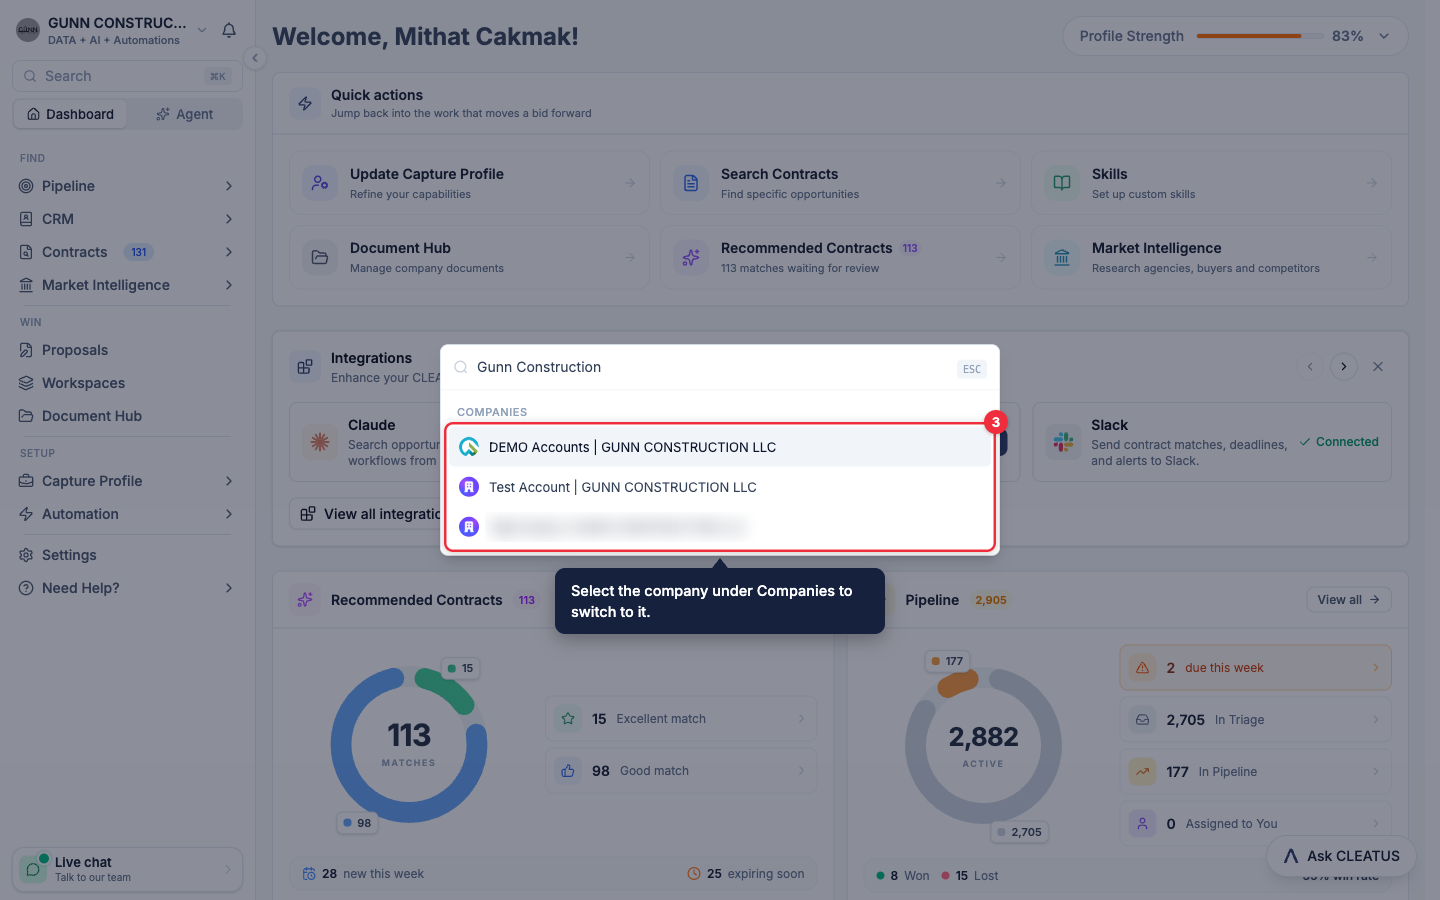
- Click Search at the top of the sidebar, or press ⌘K (Ctrl K on Windows).
- Type the company name.
- Under Companies, select the company. If the result shows an arrow, select it to show the companies of that organization, then select one.
You can also open a company from Settings > Companies. Click the actions menu of the company. Then click View to open its pipeline, or Manage to open its Capture Profile.
Edit Company and Integrations in Settings apply to the company that you opened last. Switch companies before you change them.
Who sees which companies
- Owner: sees every company in Settings > Companies, adds companies, and manages billing.
- Admin, Member, and Limited Member: see only the companies that they are assigned to.
To open a company, you must be assigned to it. In the Companies list, a company that you are not assigned to shows a gray row. Its Manage and View actions are not available. To get access, an Owner invites your email address to that company from Users and Teams. An Owner who is not assigned to a company adds themselves the same way: invite your own email address to that company. The company must have a free seat.
Give a user access to several companies
- Click Settings, then click Users and Teams.
- Click Invite User.
- Under Assign to Company, select the other company.
- Enter the email address of the user, select a Role, and click Send Invitation.
If the user is already in your organization, CLEATUS adds them to that company right away. The user takes one seat in each company that they belong to. Admins can only assign users to companies that they are assigned to.
An invitation can raise the role of an existing user, but it never lowers it. The Assigned Companies column on the Members tab shows the companies of each user. To remove a user from one company, open the actions menu of the user and point to Remove. Then select the company. For more, see Adding users to your account.
Billing for each company
Each company has its own subscription. You change the plan, the seats, and the payment method of each company on its own billing page. Only the Owner can open Billing.
- Click Settings, then click Billing.
- The table lists each company with its Billing Cycle, Seats, and Included Credits. The status of each subscription shows under the company name. Use Search companies... to find a company.
- Click Manage Billing on the company that you want. To go back to the list, click Back to companies.
A company that was canceled or is on the free plan shows Renew Subscription instead of Manage Billing. In the Companies list, a company with a failed payment shows Past Due. The Owner clicks it to pay.
To see who holds the seats of a company, open Settings > Companies. Click the actions menu of the company, then click Seats. For the steps to add seats, change plans, and download invoices, see Manage your billing.