
Adding Custom Fields
Track the details your team cares about with your own fields on pursuits and CRM records, on board columns, and in workflows.
Custom fields hold the details that your team tracks, such as probability of win (PWin) or a bid decision. You add a field once. It then shows on every pursuit, or on every customer relationship management (CRM) record of one type. In CLEATUS, a custom field is also called an attribute. This guide shows you how to add fields, show them on your pipeline, and set them from a workflow.
Or just ask CLEATUS
Set the PWin field to 40 on my Fort Liberty facilities pursuit
The agent fills in the values of fields that already exist, on pursuits, people, companies, and agencies.
Before you start:
Custom fields are part of the CRM. The CRM is part of the DATA + AI plan and higher plans. The Set Field workflow action needs the DATA + AI + Automations plan or higher. See Plans and pricing.
Add a field
Open the attribute settings
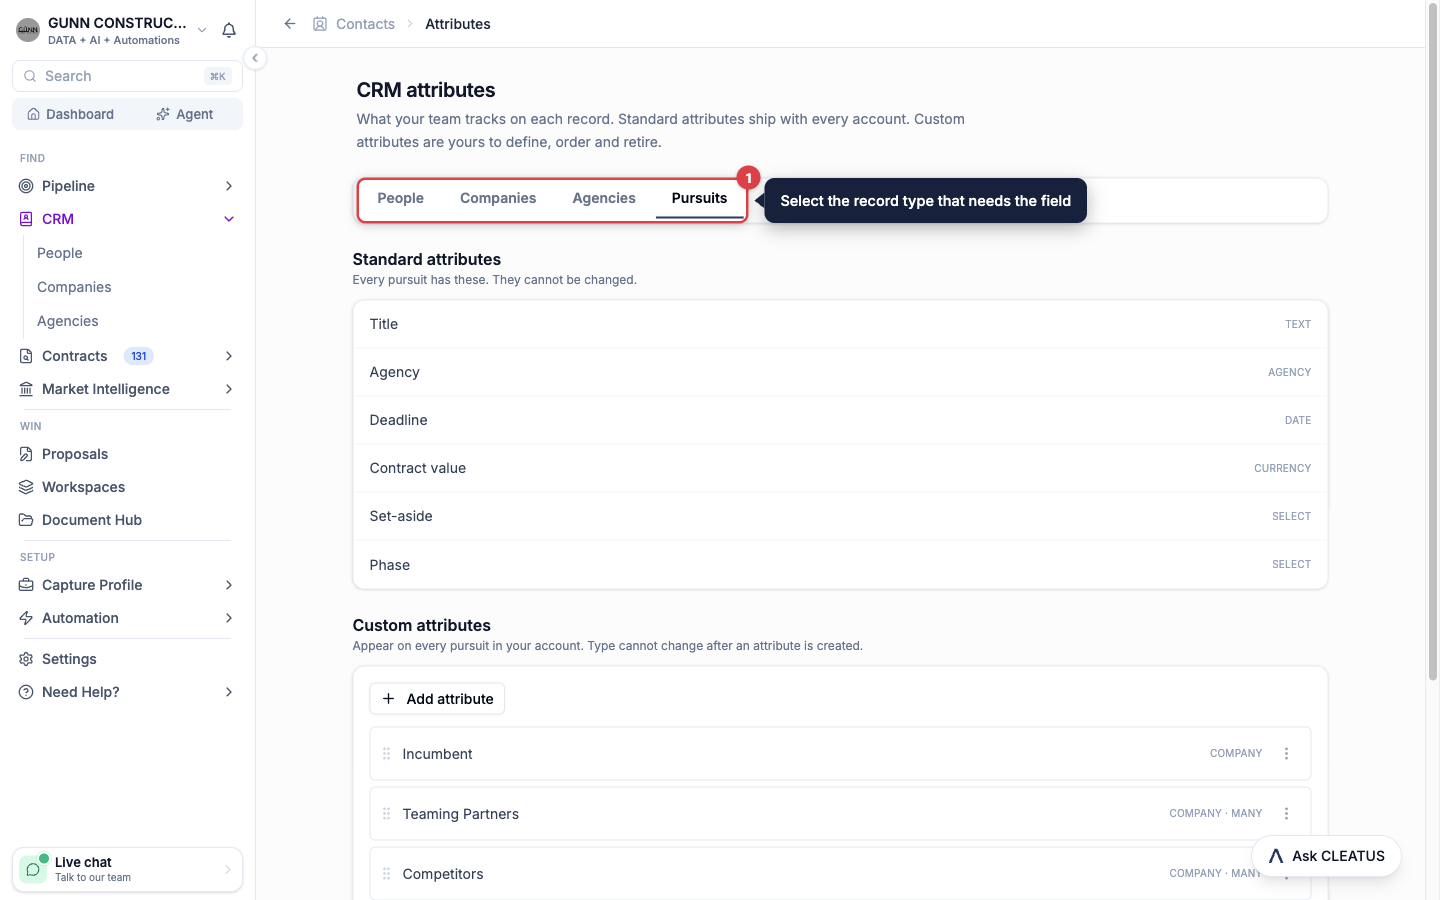
Open CRM in the sidebar, open any directory, and click Manage attributes. The CRM attributes page has a tab for People, Companies, Agencies, and Pursuits. Select the tab for the record type that needs the field. On a pursuit, you can also click Edit attributes on the Attributes card, then click Manage attributes.
Name the field and pick a type
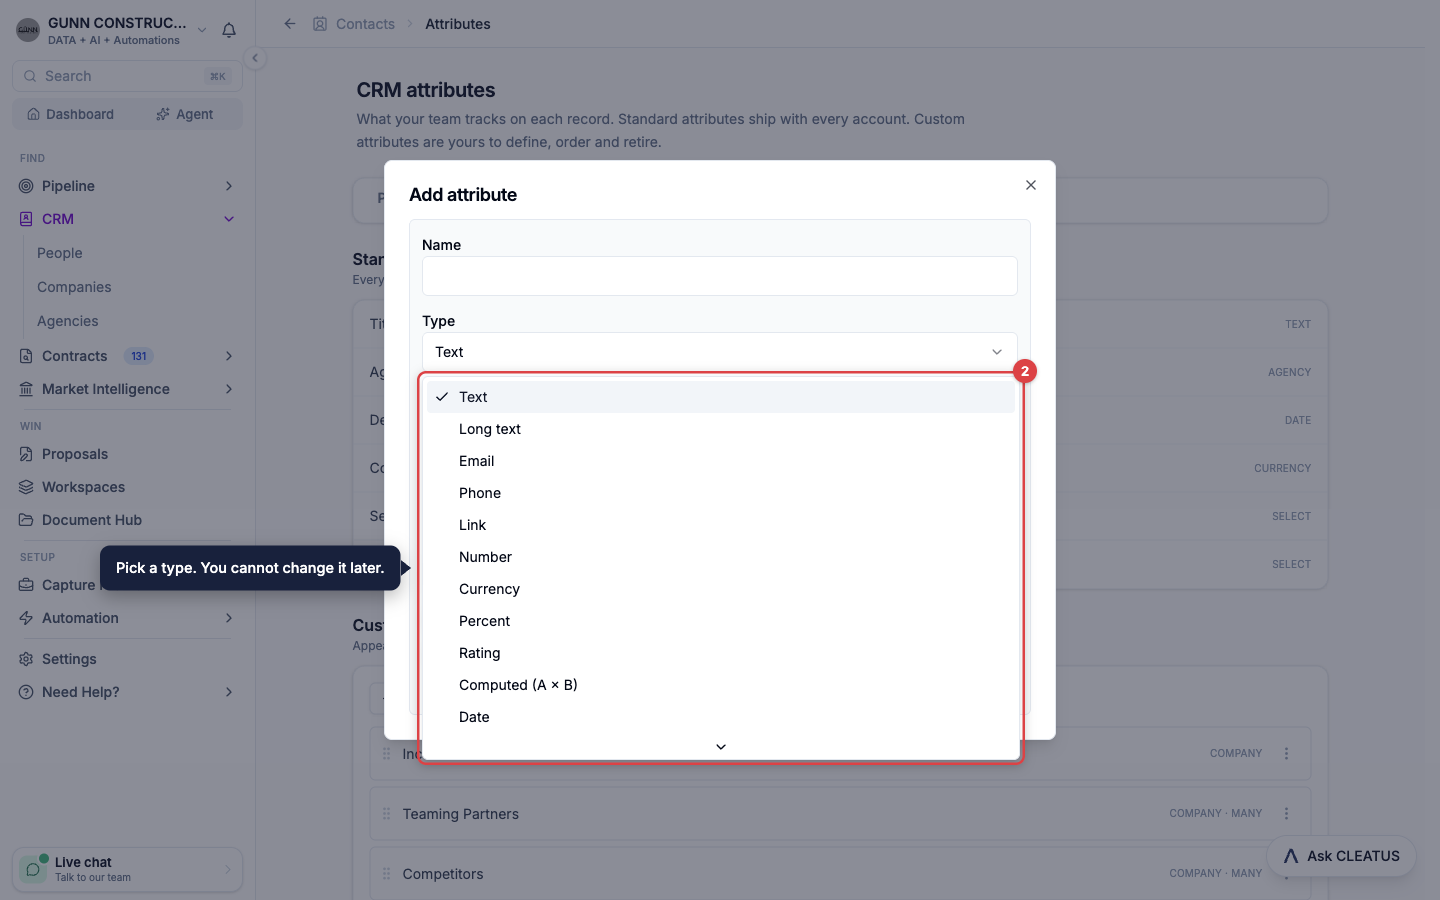
Click Add attribute. Enter a Name and select a Type. Add an optional Description. The description shows under the label wherever a teammate edits the field. You cannot change the type after you create the field.
Add the options
For a Select, Multi-select, or Status field, add the options. Click the color dot to give an option a color, and drag the options into order. For a field that links to teammates or records, turn on Allow several values to hold more than one.
Set a default value
Enter a Default value to fill the field on new records. Existing records keep their values. Fields that link to teammates or records, and computed fields, have no default.
Set the rules and save
Turn on Required to mark the field as required. The Attributes card then counts the required fields that are empty. Also, nobody can clear a required value after it is set. Turn on Unique, so no two records share a value to block duplicate values. Click Add attribute to save the field.
Field types
| Type | What the field holds |
|---|---|
| Text | One line of text. |
| Long text | Text with line breaks, up to 20,000 characters. |
| Email, Phone, Link | An email address, a phone number, or a web address. |
| Number, Currency | A number, or an amount of money. |
| Percent | A percentage. Type 17 for 17%. |
| Rating | A whole number from 1 to 5. |
| Computed (A × B) | The product of two number, currency, or percent fields. CLEATUS calculates it. Read only. |
| Date, Timestamp | A date, or a date and a time. |
| Checkbox | Yes or No. |
| Select, Multi-select | One option, or several options, from your list. |
| Status | One option from a list in a set order, such as Contacted, In talks, and Signed. |
| Teammate | A member of your CLEATUS account. |
| Person, Company, Agency | A link to a record in your CRM. |
| Pursuit | A link to a pursuit in your pipeline. |
| Signal | A link to a buying signal, such as an industry day. |
A computed field counts a percent as a fraction. For example, a total contract value (TCV) of $206M times a workshare of 17% is $35.02M. The result is empty when one of the two fields is empty.
Fields that every pursuit starts with:
Each pursuit starts with five relationship fields: Incumbent, Teaming Partners, Competitors, Contacts, and Signals. You can archive any of them if your team does not use it.
Fill in values
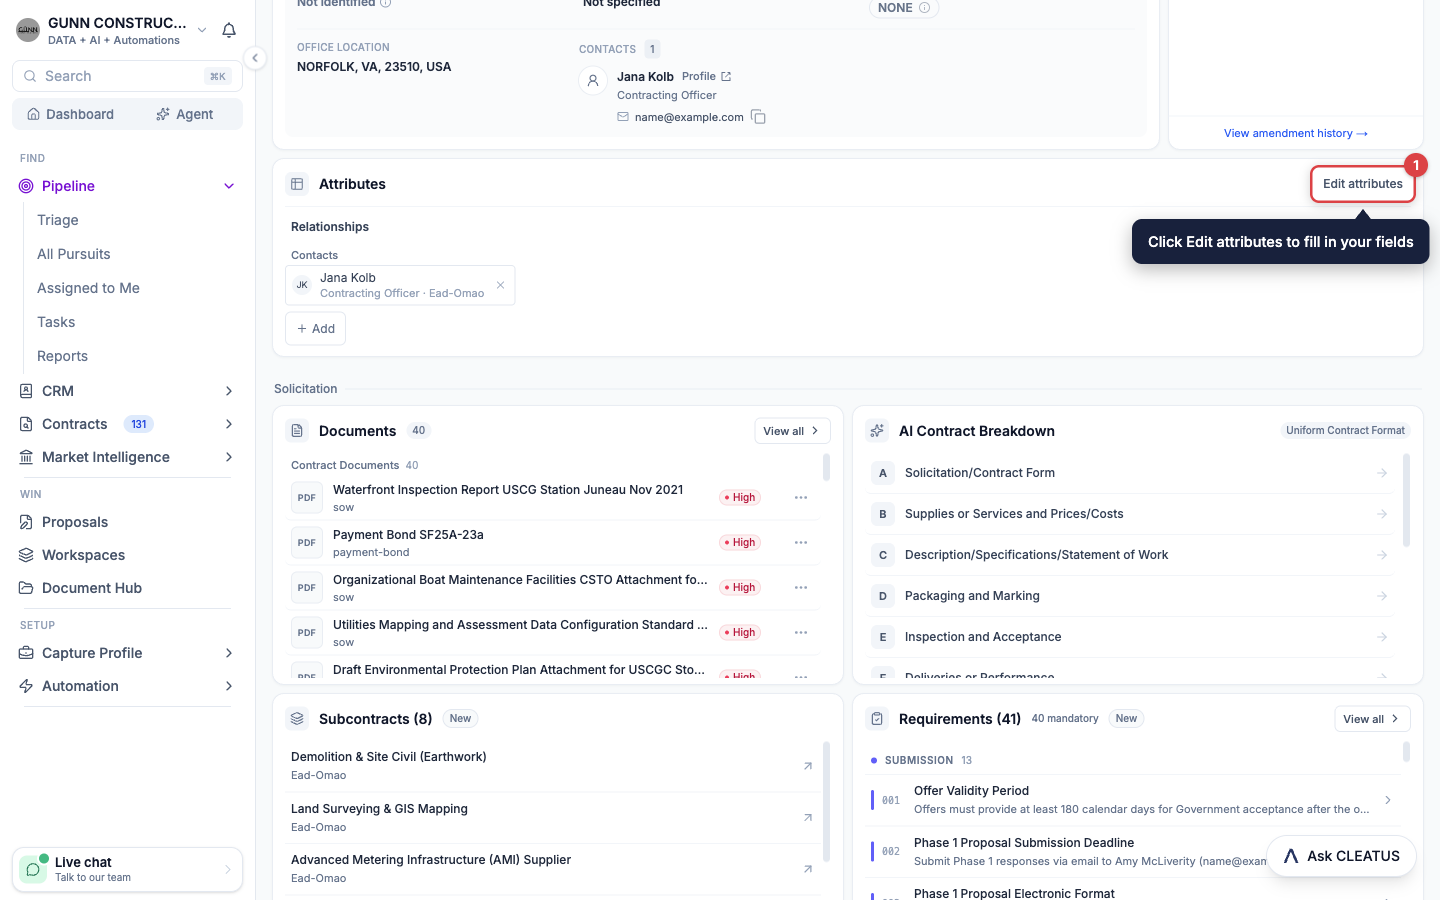
On a pursuit, open the Contract Overview tab and find the Attributes card. Click Edit attributes, or Add details when the card is empty. Changes save automatically. On a person, company, or agency, edit the values on the left side of the record page.
Arrange the fields on the pursuit page
Open the page layout
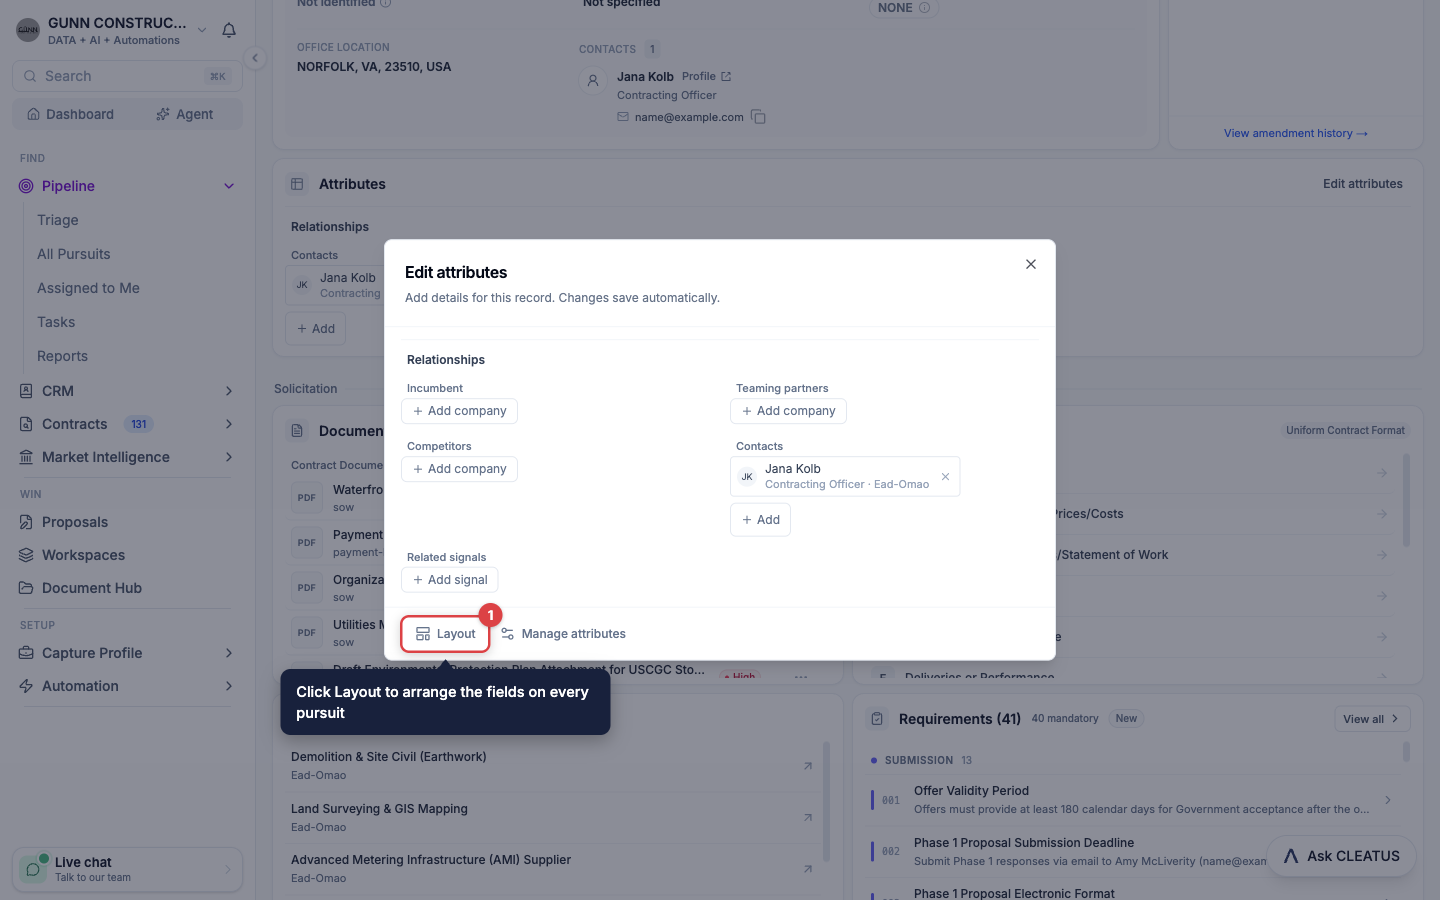
On a pursuit, click Edit attributes on the Attributes card, then click Layout. The Page layout dialog opens. The layout applies to every pursuit in your account.
Build your sections
Click Add section and name the section. Click Add attribute in a section to add a custom field. You can also add facts from the solicitation, such as the Set-aside or the Response deadline. Drag sections and fields into order. Use Move to to move a field to another section.
Save the layout
Click Save layout. Fields that are in no section show under Other attributes. To go back to the standard layout, click Reset to default, then click Reset to confirm. The reset applies to every pursuit at once.
Show fields on your pipeline
Show fields on board cards
Open Pipeline > All Pursuits. Click Display and select Board. Under Your fields, select the fields to show on each card.
Show fields as list columns
Click Display and select List. Under Your fields, select the fields to add as columns. The columns follow the order of your page layout.
Show fields in a CRM directory
On People, Companies, or Agencies, click Columns and turn on the fields. You can also filter and sort a directory by a custom field. Group it by a select, checkbox, teammate, company, or agency field.
Archive and restore a field
On the CRM attributes page, open the menu of a field and select Archive attribute. The field stops showing on records, but CLEATUS keeps its values. To bring the field back, click Show archived attributes, open the menu of the field, and select Restore attribute.
You cannot archive a field that a computed field uses. Archive the computed field first.
To change the order of the fields, drag them on the CRM attributes page.
Set a field from a workflow
The Set Field action writes a custom field each time a workflow runs, with no person in the loop.
Add the action
Open the workflow in Automation > Workflows. Hover over a step, click +, and select Set Field under Actions.
Pick the record
Select the Record Type: Pursuit, Company, Person, or Agency. For a pursuit, leave Pursuit ID empty to use the pursuit that the workflow runs on. For a person, company, or agency, insert the record ID from an earlier step.
Pick the field and the value
Select the Field. In Value, type the value or insert a variable from an earlier step. For a list field, separate the values with commas. For a select field, use the option label. Leave Value empty to clear the field.
Test the workflow
Click Run test. If a value does not fit the field type, the step fails before CLEATUS writes anything.
Tip:
Pair Set Field with an AI Agent step. For example, the agent scores each new pursuit, and Set Field writes the score to your PWin field.